Monday, May 7, 2012

Bacon Egg Cheese and Potato Breakfast Burrito


Ever since college, I've always loved breakfast burritos. Late night, late morning.. you know the drill. I believe it was last year that I decided to start making my own in the mornings before class and work. They were so delicious and would keep you full until nearly dinner time. My favorite has always been bacon egg cheese and potato burritos, so that's what I usually stick to. 

Most would probably consider this my "signature" breakfast dish. It's easy to make and if you choose the right ingredients, you can make it with a healthier take on a fast food option. I've always had great compliments from those who have tried it. Now your turn, Enjoy! 

Bacon Egg Cheese and Potato Breakfast Burrito

Serving Size: 
Makes 1 burrito

Ingredients: 
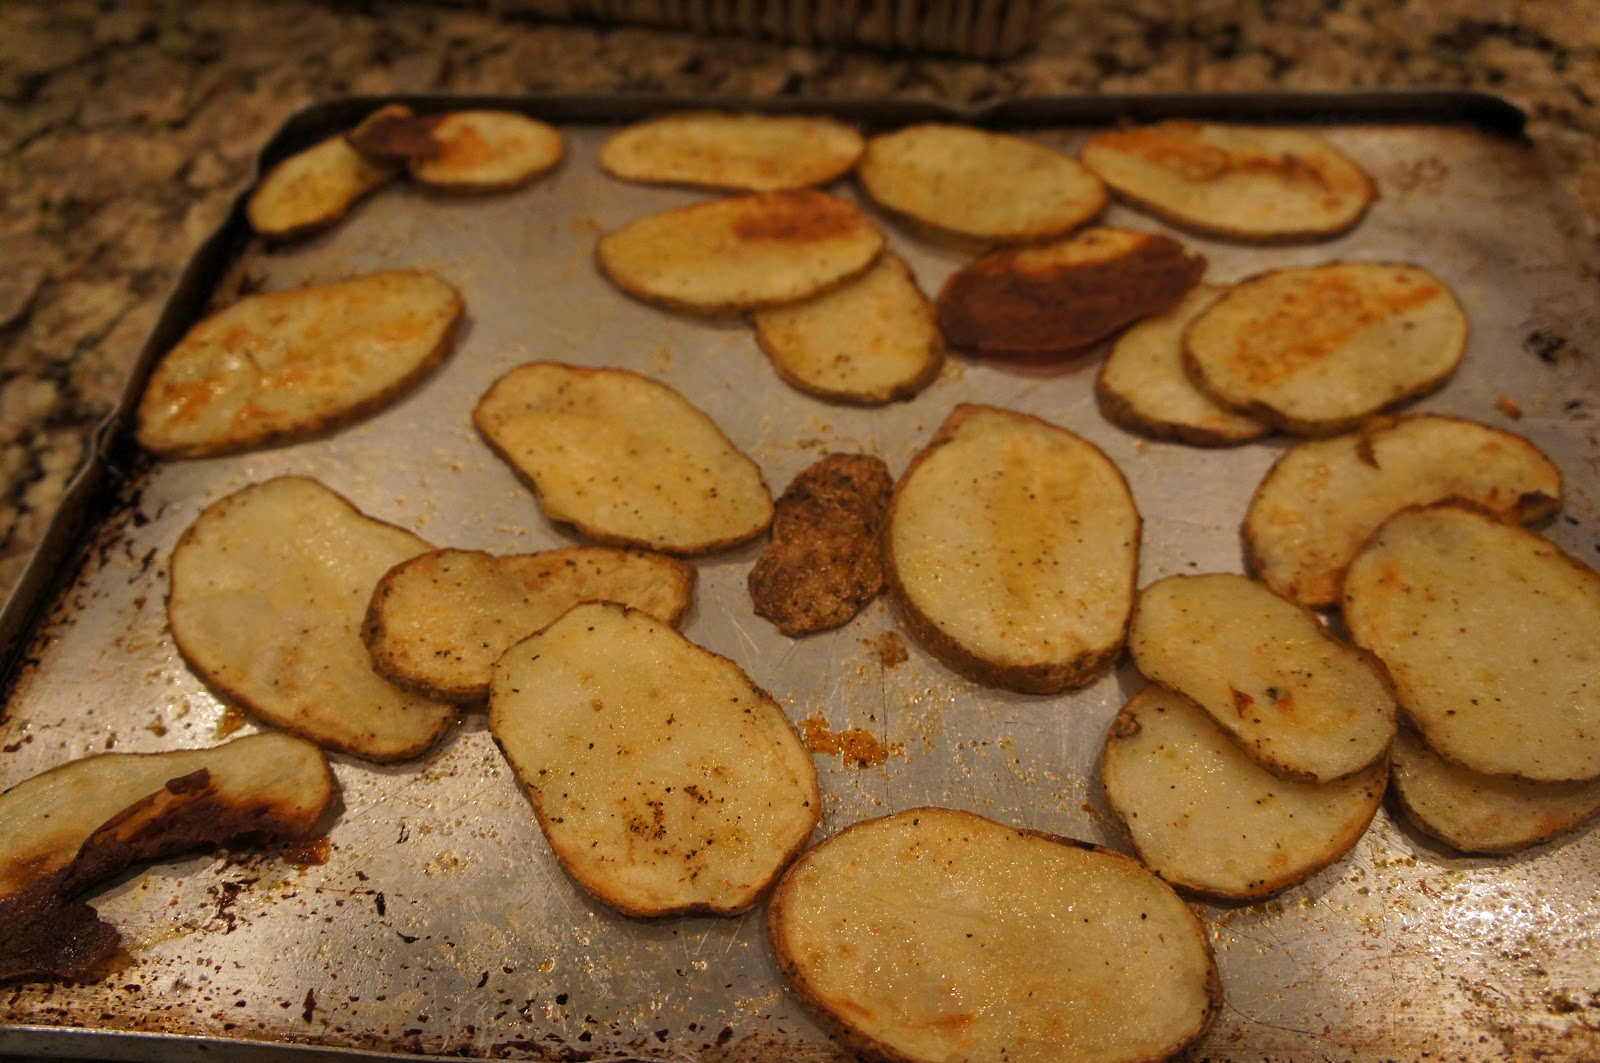
3/4 cup of frozen hash-browns (I've used shredded but have taken a liking to the larger potatoes) 
2 tbs. oil (I generally use Olive Oil or Grape Seed Oil for a healthier option but Canola and Vegetable Oil work too)
1 large egg 
1 tbs. milk (low fat is best) 
1 strip of bacon (I've used turkey bacon but if you like it crispy, make sure it is the thinnest cut)
1/4 cup shredded cheese 
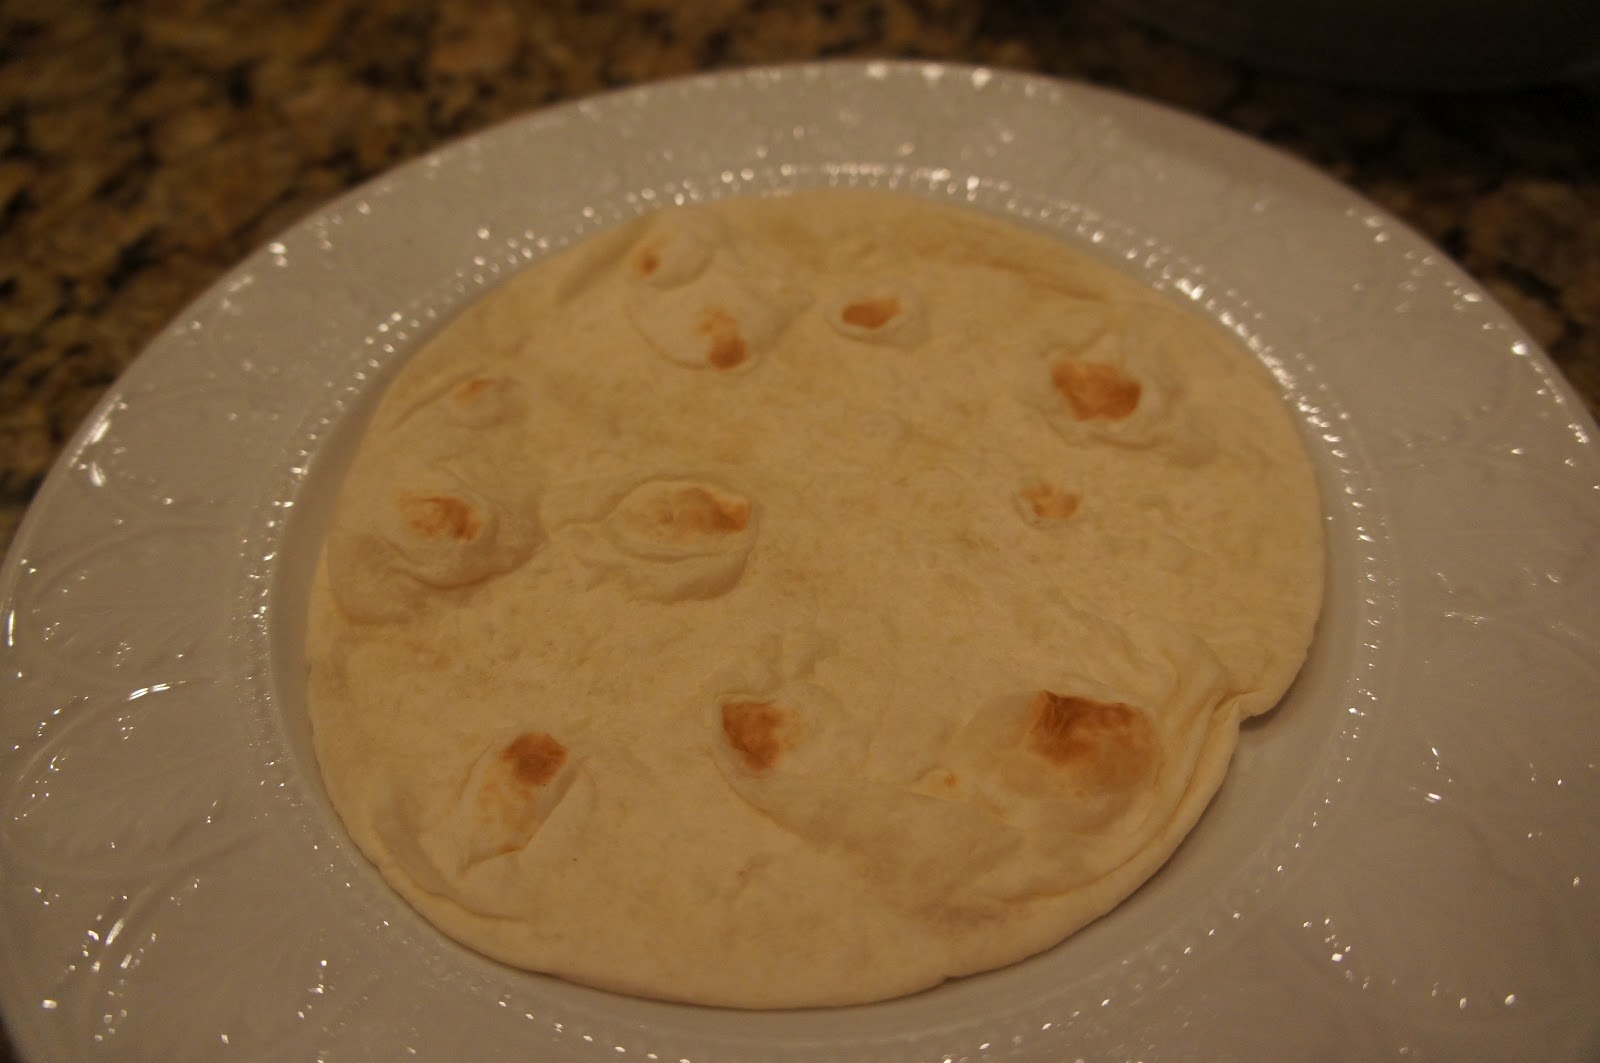
1 tortilla (I use a low carb choice for a healthier alternative)
2-3 tsp of season salt or just salt and pepper
Pam (buttering spray)

Technical: 
Stove 
3 Skillets
Microwave

Time: 
Prepare: 5 minutes
Cook: 10 minutes

Instructions: 
Start with the frozen potatoes because they take the longest to cook. Place your first skillet on the stove and add about 2 tbs. of oil to it. Cook on medium heat. After the oil has warmed up, place the frozen potatoes into the skillet. These will take about 8 minutes to cook. You will know when they are finished by their crispy brown color. I usually add 1-2 tsp of cajun season salt to them, as well. If you do not like spicy, just season with salt and pepper to your taste. Once finished, allow to dry on a paper towel to rid any extra oil.

While the potatoes have started cooking, place your second skillet on the stove and add your strip(s) of bacon to it. Again, cook on medium heat. Just flip them over after a couple of minutes until they are browned on both sides and become crispy. Once they are finished cooking, place them on a paper towel to rid any extra grease. 

After you have the potatoes and bacon cooking, it's time to multi-task with the egg. Crack the large egg into a bowl and add the 1 tbs. of milk to it. Mix these together with a whisk or a fork. I usually add some cajun season salt to these as well, but salt and pepper will do. 

Next, place the 3rd skillet onto the stove and spray with Pam or other choice for greasing the skillet. Place the egg mixture into the skillet and cook over medium heat. These scrambled eggs do not take more than 2 minutes at most. Using a spatula, keep turning them until they have formed together and are fully cooked. 

Lastly, while the egg is nearing done, dampen a paper towel and put the tortilla(s) under it. Warm in the microwave for about 10-12 seconds. Remove the paper towel and then begin to add your finished egg, potatoes, bacon, and finally, the cheese. 

I have an extraordinarily weird obsession with ketchup and like to pair mine with that. However, fresh salsa is always a great choice! 

Note: 
To make this the healthiest option, I would use a low-carb tortilla, low fat or organic cheese, turkey bacon or organic bacon, low fat milk, olive oil or grape seed oil, and make sure to drain excess oil off of the bacon and potatoes. 


Peanut Butter Cup Chocolate Brownie Bites


Yesterday I was on Pinterest and came across My Chocolate Therapy's blog and thought the recipe listed looked worthy of making. It was Sunday afternoon and I was rather bored, so I decided to make some. They turned out delicious! I changed a few things to make them a little "healthier" for my taste and my Mom's diet. Also, I couldn't find the mini-muffin pans, so I used the normal sized ones for bigger "bites." Since mine came out so rich, next time I would definitely try the mini-muffin pans for a bite sized treat. 


Peanut Butter Cup Chocolate Brownie Bites
Recipe influenced from My Chocolate Therapy's Blog


Makes 1 dozen brownies


Ingredients: 
3/4 cup granulated sugar (I changed this to Stevia for a healthier alternative/ Splenda would work well too) 
1/4 cup butter, softened
1 tablespoon water
3/4 cup 60% Cacao chocolate chips (Dark chocolate chips)
1 large egg
1/2 teaspoon vanilla
1 cup all purpose flour
1/4 teaspoon baking soda
3/4 cup Semi-Sweet chocolate chips, plus about 1/3 cup more for garnishing
3/4 cup creamy peanut butter


Technical: 
Microwave (melting ingredients)
Oven (baking) 
Muffin Pan (mini would work best but large works too) 


Time: 
Prepare: 10 minutes
Cook: 13 minutes

Instructions: 

Preheat oven to 350 degrees. Spray or grease 12 muffin cups. (Or mini-muffin tray)

In a medium sized microwave-safe bowl combine sugar, softened butter, and water. Microwave on high for about 45 seconds or until butter is melted. Stir in 3/4 cup 60% Cacao chocolate chips until melted. Stir in egg and vanilla extract, mix well. Add flour and baking soda, stir until combined. Allow the batter to cool to room temperature (doesn’t take very long). Then, stir in 3/4 cup semi-sweet chocolate chips. Spoon batter evenly into muffin cups.

Bake for 13-15 minutes or until top is set and a toothpick inserted into center comes out slightly wet. I cooked mine for 14 minutes and it was a little too long. I would try 12-13 minutes. (If using a mini-muffin pan, the cooking time would probably be more like 10-13 minutes.) After brownies are out of the oven, wait for centers to fall. This should happen upon cooling. If not, (they did not for me) then tap the centers with the back of a teaspoon to make a hole for the peanut butter.

Place peanut butter in a small microwave-safe bowl. Microwave on high for 45 seconds then stir. While brownies are still warm, spoon about a tablespoon full of peanut butter into the center of each brownie. Top with remaining 1/3 cup semi-sweet chocolate chips. Cool completely in pan. 

Notes:
The original recipe called for semi-sweet and milk chocolate chips instead of the dark chocolate and semi-sweet chocolate chips that I used. Mine turned out very rich, so if you like dark chocolate, you will enjoy these. Otherwise, using semi-sweet and milk chocolate chips would make them less rich, if you prefer.


Thursday, May 3, 2012

Strawberry Kiwi Banana-Pom Smoothie


I've been meaning to try out some smoothie recipes and today I decided I would start the day off right with a fruit-filled smoothie. I've heard that starting off with a frozen banana is a healthy way to replace the  frozen yogurt/ ice cream/ and sorbets that are commonly used in making smoothies. From there, I gathered  everything I could find in my fridge that "might taste good." Surely enough, my judgement worked and I had a healthy fruit-filled smoothie that has plenty of protein to hold me over while I am preparing for my interview later today. 

Strawberry Kiwi Banana-Pom Smoothie

Ingredients: 
1 frozen banana
1 serving of your choice of yogurt (I used Activia Greek Pomegranate and Berry yogurt)
1 kiwi
2 strawberries

Technical: 
Blender
Vegetable Peeler

Time:
Prepare: 10 minutes

Instructions: 
Start off with a frozen banana. This is what keeps the smoothie staying cold and gives it that ice-y texture. You might have to run it under some water to get the peel off. I went ahead and used a vegetable peeler to make sure I got off the whole peel. Next, using the vegetable peeler again, I took the rind off of the kiwi. Then, cut off the tops of the strawberries and add them also to the blender. Finally, add your choice of yogurt and start blending! 

Initially, you can choose whatever fruits and yogurt you like and it will come out great. You might even skip the yogurt if you are watching carbs because the banana has enough to hold you over as it is. It's a great way to get a healthy start to your morning!


Betsy's Bison Burgers

As you know, I am a big advocate for hormone-free meats. I "forced" my Mom to buy some organic grass fed ground beef and some organic ground bison beef. She decided to combine the two and make some hamburger patties with them. They turned out great!


One of the advantages of cooking with bison meat is that it is lower in fat, calories, cholesterol than normal ground beef. Also, it is higher in protein and vitamins. I got these fun facts here


Betsy's Bison Burgers


Ingredients:
1 lb. organic ground beef 
1 lb. organic ground bison
3 tsp of steak seasoning
hamburger buns
1-3 tbs. butter
cheese
lettuce
tomatoes
onions
pickles
condiments (your choice) 


Technical: 
Grill (charcoal, gas, or George Forman)
Stove 
Large Skillet (for toasting the hamburger buns) 


Time:
Prepare: 12 minutes
Cook: 10 minutes (until cooked throughly/ not pink in the center)


Instructions: 
Start by combining the two packages of meat. This is best using your hands, but make sure to wash them carefully before and after handling the meat. Next, add the preferred steak seasoning to it. Continue to mix with your hands. Then, once the seasoning is evenly distributed, form the meat into patties. Depending on your taste, form them to your choice of thickness and largeness. The thicker it is, the longer it will take to cook. 


You can prepare this ahead of time and put the patties into the fridge for a few hours until ready to cook. Once you have the grill heated to the right temperature, place the patties on the grill and let them cook for a few minutes and then flip them. Cook until there is no pink in the center of them. 


While the burgers are on the grill, you can butter the buns one by one and place them on to a heated skillet on the stove. Just allow them to brown a little bit and place them onto plates. As the burgers are finished, begin customizing them according to everyone's tastes. Enjoy!

Spicy Homemade Baked Potato Chips


I originally came up with this idea after having these "chips" at a few of my favorite restaurants. The first being, Novrosky's here in my hometown. They call them "Novo Chips" and they are a hit. I got a late start and these turned out more like fries than crispy chips but if they were to have remained in the oven a little longer and had been cut a wee-bit thinner, they would have been right on target. Nevertheless, they were still great! Also, the "real" way restaurants tend to cook them is in a fryer. I choose to keep it a little on the healthier side by baking them. 


Spicy Homemade Baked Potato Chips 


Ingredients: 
3-4 Russet Potatoes (I used organic) 
3 tbs. of Olive Oil or Grape Seed Oil
2 tsp. of Spicy Cajun Seasoning (I used "Slap Ya Mama") 
2 tsp. of Steak Seasoning (I used "Tex Joy Steak Seasoning")


Technical: 
Mandolin (for cutting the potatoes in even slices)
Oven (for baking the chips) 
Baking Cookie Sheet


Time: 
Prepare: 10 minutes
Cook: 20-30 minutes


Instructions: 
Preheat the oven to 400 degrees F. 


Start by rinsing the potatoes in the sink. (The organic ones tend to have a little more dirt on them sometimes.) Then, using the mandolin, or a very sharp knife, slice the potatoes in thin slices. I did enough to fit on a baking cookie sheet for our family of four. Next, I placed them into a bowl and poured 2-3 tbs. of grape seed oil over them and added the spicy cajun seasoning and mixed them by hand. (If you don't like spicy, you can skip adding the cajun seasoning.) 


Place the potato rounds one by one, single layered, on a cookie sheet. Once completed, add a little steak seasoning (to taste) over the tops of each one. Now, they are ready for the oven. They cook for about 20-30 minutes but make sure to flip them at least once, maybe twice if needed. 


Take them out to cool and enjoy with your favorite dipping sauce!


Wednesday, May 2, 2012

Organic Grilled Chicken Salad


Above, I added a picture of an organic grilled chicken salad I made for my parents. They said it was better than their favorite restaurant’s grilled chicken salad. I’ll take that as a compliment!
Organic Grilled Chicken Salad
Ingredients:
  • Lettuce (Organic Romaine and Organic Spring Mix)
  • Organic Grape Tomatoes 
  • Cucumber (Chopped)
  • Boiled Egg (Chopped)
  • Shredded Carrots
  • Chopped Purple Onion
  • Organic Grilled Chicken (Prepared by marinating the organic chicken strips in your choice of Italian dressing for 1-10 hours and then placed on a grill for a few minutes on each side until there is no pink in the center.)
  • Shredded Sharp Cheddar Cheese
  • Salt and Pepper to taste
  • Your Choice of Dressing (Honey Mustard, Ranch, Italian…)
Technical:
  • Grill (Charcoal/ Gas/ or George Forman)
  • Stove (to boil the egg) 
  • Cheese Grater (to shred the block of Sharp Cheddar)

Gluten Free Chicken Strip Quesadilla


Tonight I decided I was in the mood for a wrap of some kind. I searched in my freezer and refrigerator and came up with the idea of turning a wrap into a chicken ranch quesadilla. It was plenty messy, but just as good. Enjoy!


Gluten Free Chicken Strip Quesadilla

Ingredients:
  • Tortillas (Gluten Free if necessary)
  • Fried Chicken Strips (cooked according to oven instructions- I used a Gluten Free brand)
  • Lettuce
  • Tomatoes
  • Shredded Sharp Cheddar Cheese
  • Ranch dressing 
Technical:
  • Oven (for cooking the chicken strips to package instructions)
  • Quesadilla Maker (for warming the tortillas and melting the cheese in the quesadilla)